SIP Trunking has become a popular method for businesses to achieve more flexible and cost-effective communication solutions in telecommunications. SIP (Session Initiation Protocol) Trunking allows companies to replace traditional phone lines with a VoIP (Voice over Internet Protocol) service. Twilio, a cloud communications platform, offers one of the most robust SIP Trunking services today. This guide will walk you through the steps to create a SIP Trunk with Twilio and thereafter configure FreePBX to use this trunk to make calls globally. This is a perfect setup for remote offices, remote workers, or On-the-road salespeople.
Installing FreePBX
First and foremost, to proceed with this guide, ensure you have a fully installed and updated FreePBX system. For a quick and hassle-free start, we provide pre-configured Cloud Images, offering a reliable and production-ready FreePBX installation. The best part? These images are readily accessible on your favourite cloud platforms. Use the links below to set up your FreePBX system, and once that’s complete, return to this tutorial to continue.
| FreePBX v16 |  |  | ||
| FreePBX v17 | | |
Sign Up for a Twilio Account
To create a SIP Trunk with Twilio, sign up for an account on the Twilio website (www.twilio.com). This initial step is crucial for setting up a secure and personalized account on Twilio’s platform, ensuring you can access their wide range of communication services.
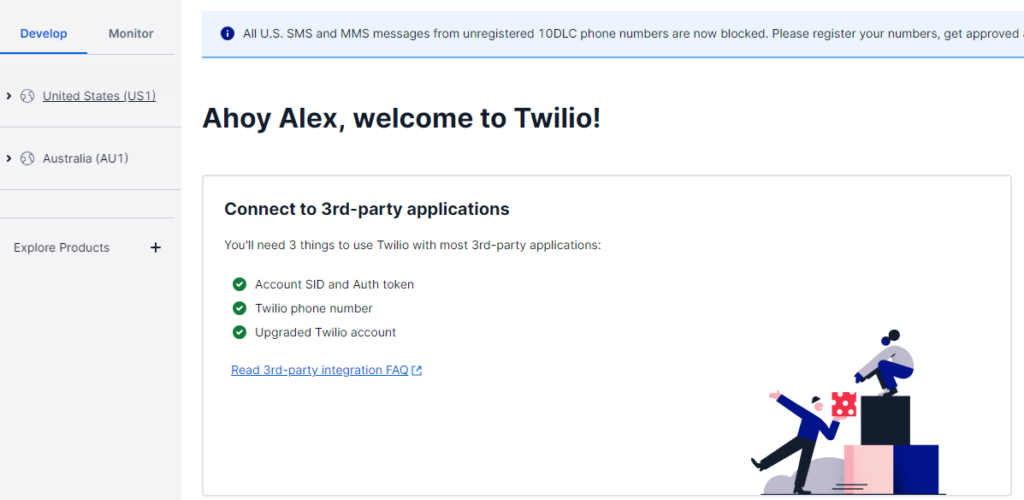
After successfully creating and verifying your Twilio account, you need to get a phone number and upgrade your Twilio account as well. Your fully activated account dashboard will look like the one below.
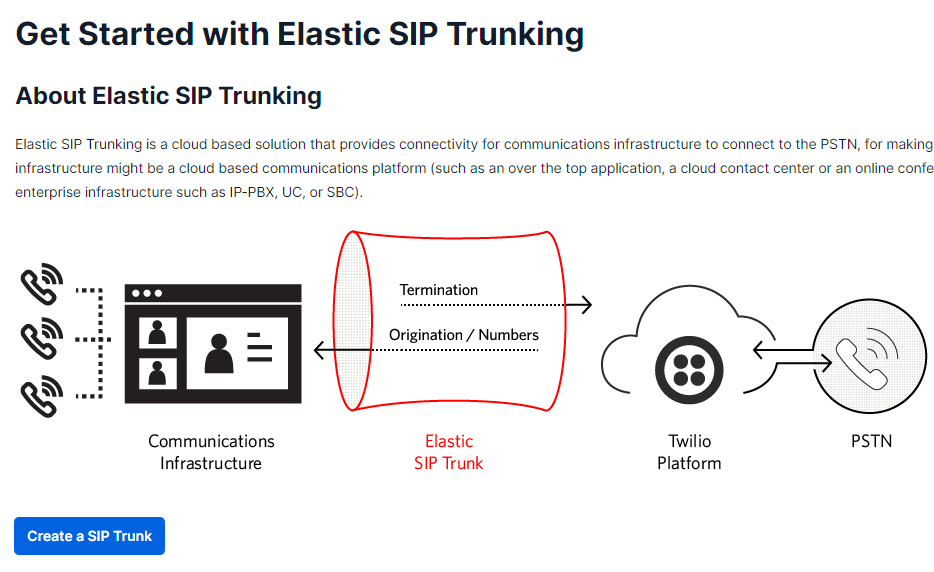
The next step involves setting up your project tailored for SIP Trunking. On the dashboard, you should be able to start setting up the SIP trunk by selecting your country on the left panel and then selecting “Elastic SIP Trunking”.
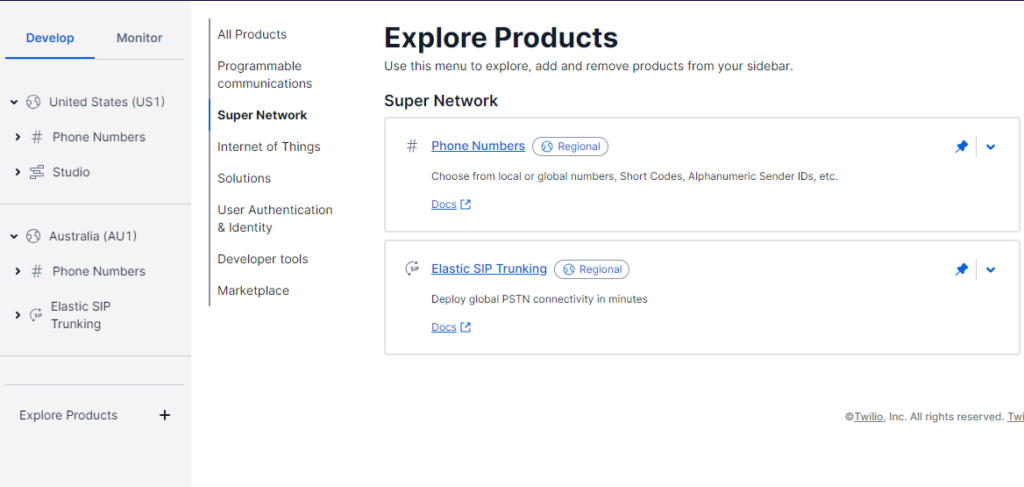
If “Elastic SIP trunking” does not appear under your selected country, you can still get it by clicking “Explore Products” and then selecting “Super Network”.
Setting up your SIP Trunk (Twilio Portal)
Once in the “Elastic SIP Trunking” section, click “Create new SIP Trunk” to begin and give your trunk a recognizable, friendly name. That’s all there is to this; the next steps involve personalizing this trunk to work with your FreePBX system.
Termination settings
These are settings for Outgoing voice calls from your FreePBX. Your trunk and outbound routes will use these settings to direct calls. Click “Termination” from the left side menu on your Twilio portal to get started.
For termination SIP URI, I will set that as “solvedevops.pstn.twilio.com”; this will be the “SIP Server” name I use on the FreePBX side of the configuration
For added security, you need to set (use + button to add either setting):
– IP access control lists: This is the IP address of your FreePBX (the same one you use in the browser – if you have not configured a DNS name for your FreePBX)
– Credential List: Create credentials here (username/password) that we will use in a bit.
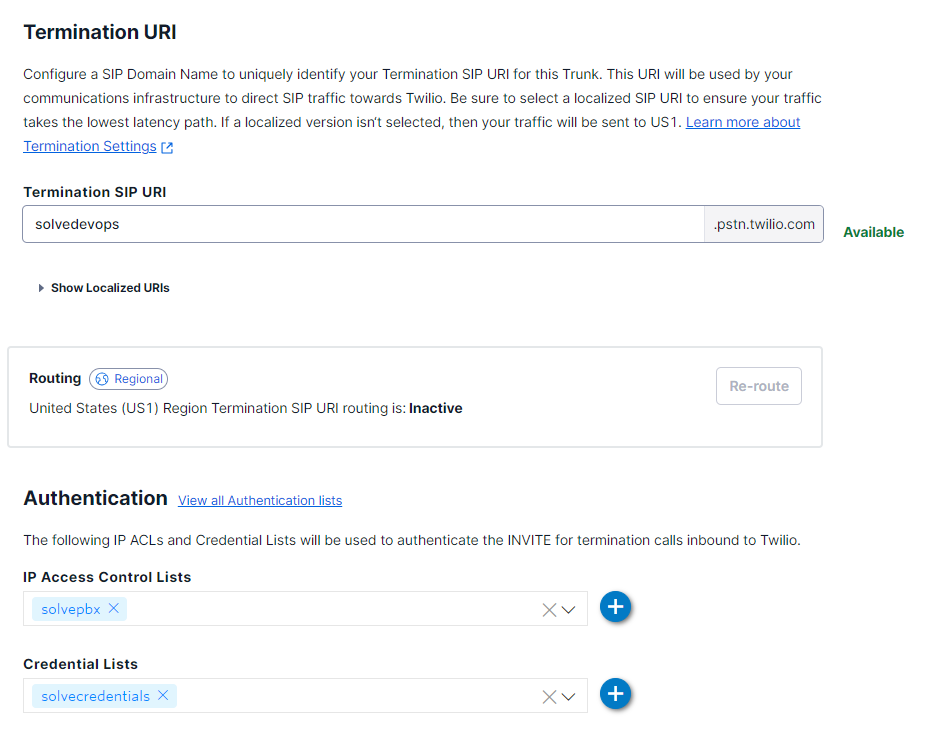
Remember to save your changes before leaving the “Termination” section of the trunk configuration.
Note that the Routing status will remain “Inactive” until we also configure this trunk on the FreePBX side.
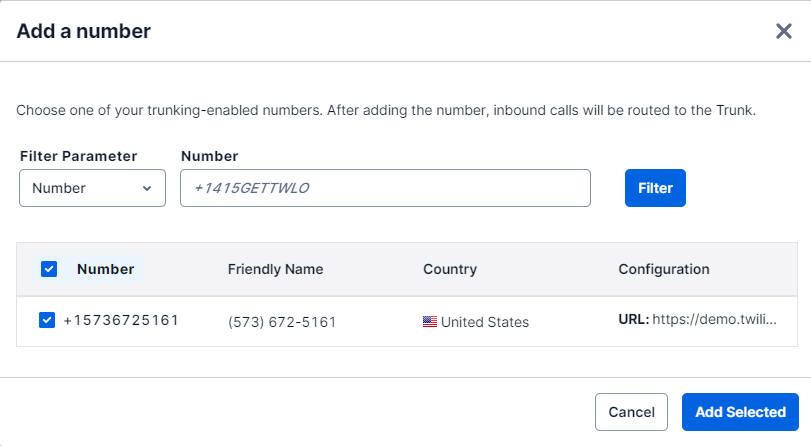
Before we can use this trunk, we need to attach a Twilio number to it. So head to “Numbers” and click “Add a number”. Select “Add an existing number” if you have a number but have not assigned it to any trunks; otherwise, click “Buy a number” to get assigned a new number.
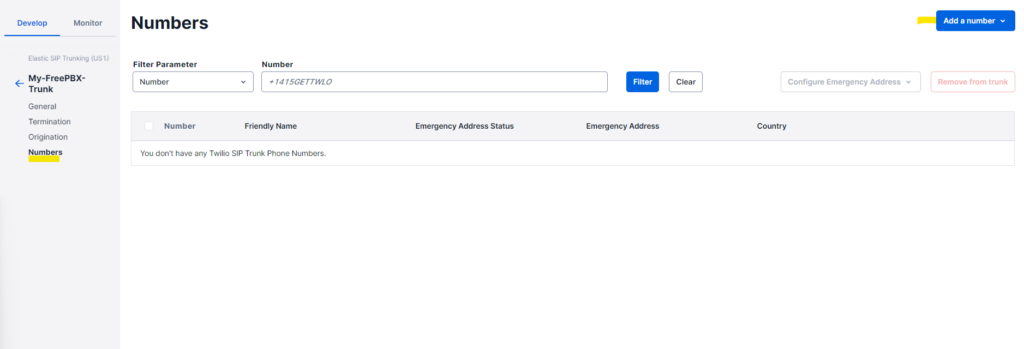
For this demo, I will use the demo number from Twilio.
That is all the settings for call termination; if you want to test outgoing calls from your FreePBX, skip over to the “Settings on FreePBX” configuration part below.
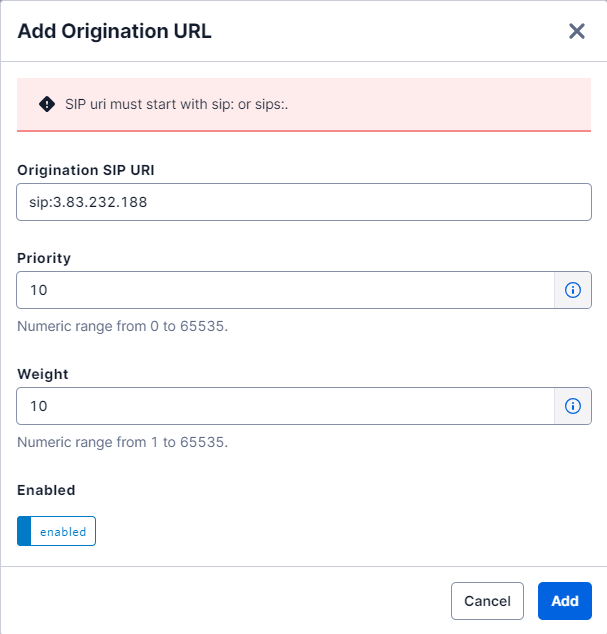
Origination
Origination settings on the Twilio portal help Twilio determine how to route calls coming in on the number you added to the trunk. These are calls from external parties, like your customers. We will tell Twilio to direct them to our FreePBX (FreePBX IP address). Click on the + button.
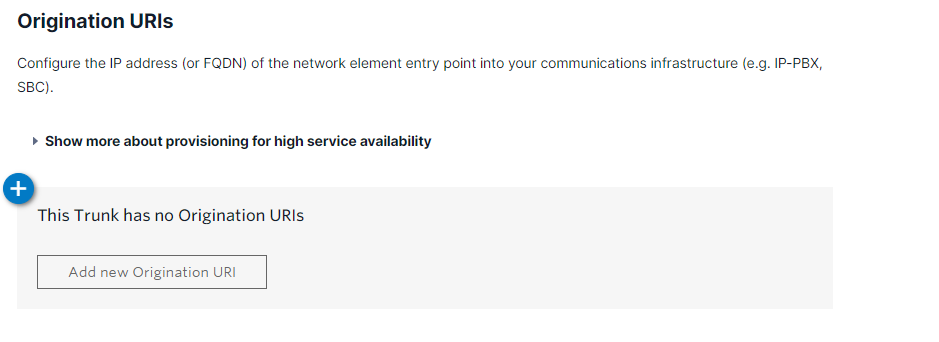
We add the IP address information for our FreePBX. Remember to prefix it with sip:
Settings on FreePBX
To begin the process, navigate to the “Trunks” section under the “Connectivity” menu on FreePBX. Here, you’ll select the option to add a new SIP (chan_sip or pjsip) trunk, entering relevant details such as the Trunk Name, Outbound CallerID (General Tab) and Username Secret and SIP server (pjsip Settings Tab) to match the details used on Twilio portal.

And on the “pjsip Settings” tab
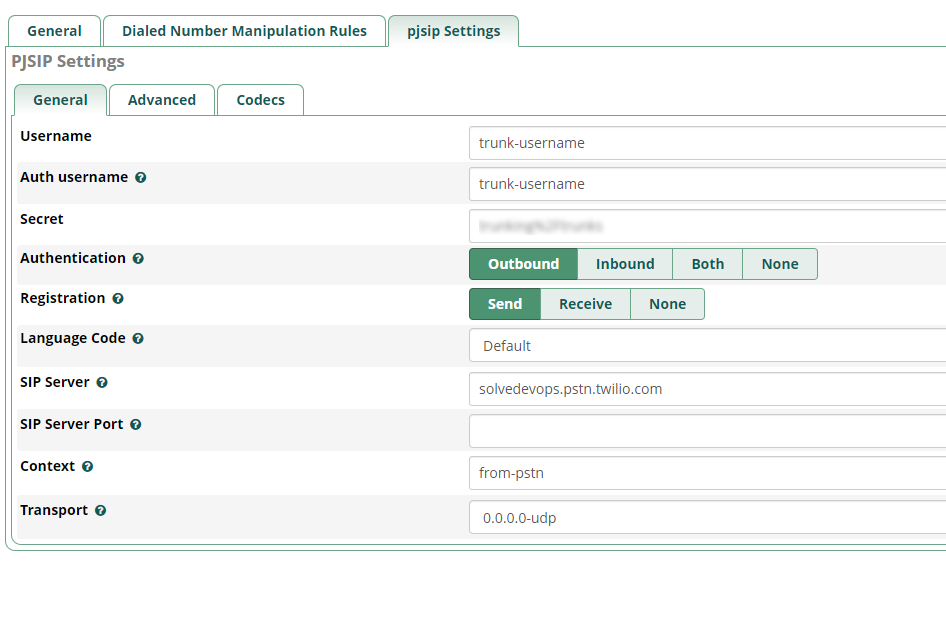
Once you have submitted trunk settings on FreePBX, remember to “Apply” setting on top right of the FreePBX console, otherwise your setting will not be saved.
If you matched the trunk settings correctly, you will notice that the routing on Twilio now shows the trunk as “Active”.

Before we use this trunk to send out calls, we also need to configure an outgoing route on our FreePBX to use this trunk. Let’s do that.
Outbound Calls
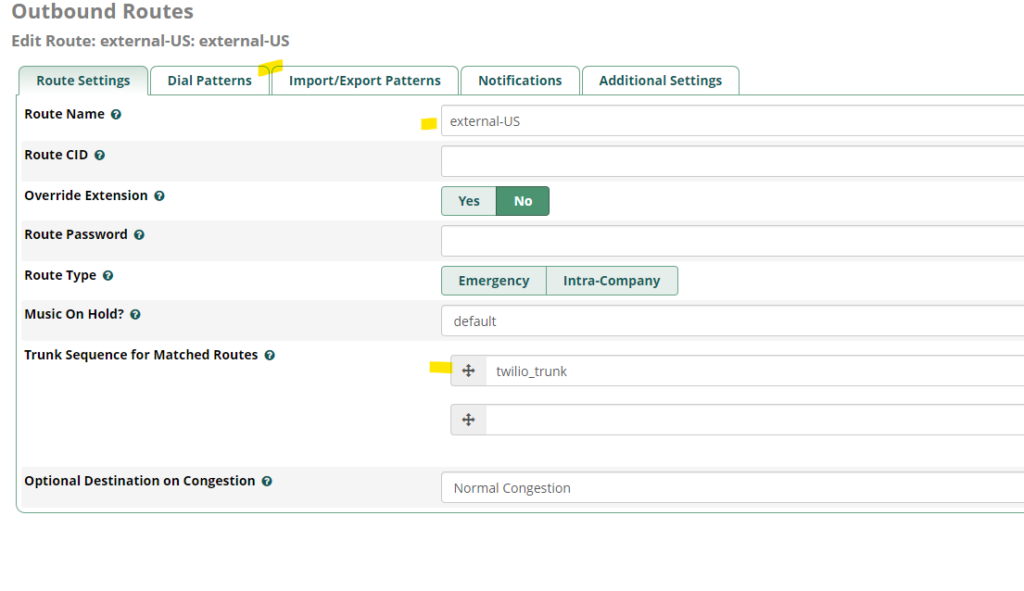
On the FreePBX administration interface, navigate to the “Connectivity” menu and select “Outbound Routes.” This section defines how calls from your internal network are directed to the wider world. Here, you’ll create a new route by specifying a route name and determining the dial patterns that apply to this route—these patterns dictate the numbers your system users must dial to utilize this route. You’ll also need to select the Twilio SIP trunk you’ve previously set up, associating it with this outbound route. This association tells FreePBX to use the selected SIP trunk for calls matching the specified dial patterns. After configuring these settings, including any additional route settings as needed, save your changes and apply the configuration.
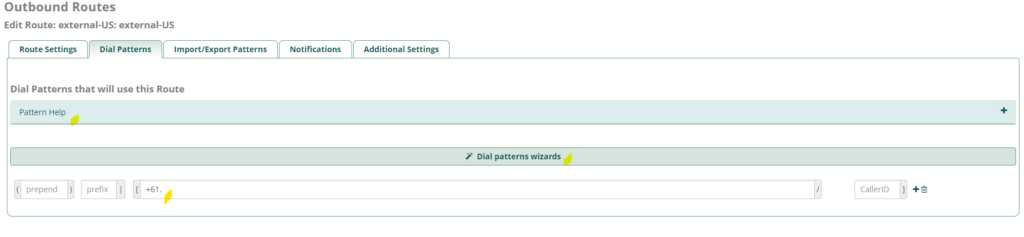
Dial Patterns:
Dial Patterns are the controls to determine how we want to route calls externally or internally. For example, if you want to use one route for calling the USA and another for calling Australia, Dial Patterns are what FreePBX would use to make these routing decisions.
You could always use “Dial Pattern Wizards” and “Pattern Help” to learn how to direct calls. To simplify this, I am using the match “+61.” to match all numbers to Australia. The period “.” after +61 tells this pattern that any number of digits after +61 is acceptable. If a user on our PBX dialled any other number, for example, a USA +112312301234, this route would not carry it.
That’s it; your FreePBX is ready to make outbound calls.
Inbound Calls
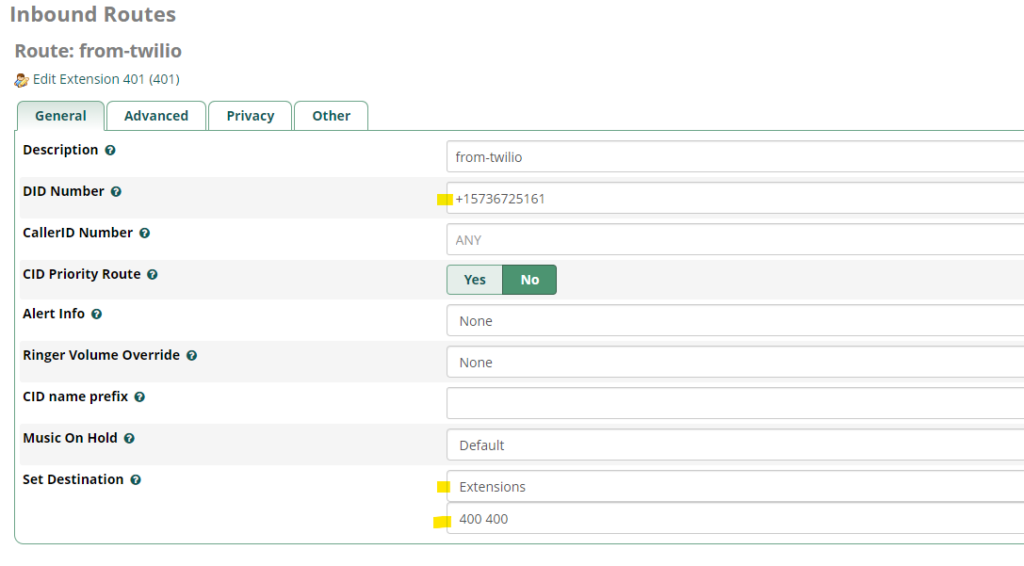
On the FreePBX administration interface, navigate to the “Connectivity” menu and select “Inbound Routes.” This section defines how calls from external parties are handled. In our example, I am forwarding all incoming calls to extension 400. There are other options available, including sending your calls to an IVR system. Note that I set the DID as the Twilio number. This will help identify which calls I want this route to handle.
Testing Your SIP Trunk
After configuring your sip trunk, it is important to test your trunk and how it interacts with your FreePBX;
You will need a SIP client registered as an extension on your FreePBX; if you are unsure how to do this, please refer to this guide that covers beginner configurations for FreePBX; adding an extension to FreePBX is one of those steps covered.
For outbound call test: Using your sip client registered to your FreePBX, you should be able to dial a number that matches your dial pattern, in my case +61123456789
For the inbound call test: You should be able to dial the number attached to your Twilio SIP trunk, and that will direct the call to your FreePBX and eventually to the extension you have configured.
Conclusion
Creating a SIP Trunk with Twilio is a straightforward process that opens up flexible, cost-effective business communications possibilities. By following the steps outlined in this guide, you’ll be well on your way to setting up a robust telecommunications system that leverages the power of VoIP and the global reach of Twilio’s network. Remember to test thoroughly and secure your SIP Trunk to ensure reliable and secure communication for your business.
Further Reading
How to Easily Set Up Your First FreePBX System: A Beginner’s Guide
FreePBX 16 vs 17: A Detailed Comparison of New Features and Improvements.
FreePBX on Azure – Getting Started
FreePBX on AWS – Getting Started
Enabling Call Detail Records in FreePBX WebUI
Did You Just Read Gibberish?
Our Tech Support Staff understand gibberish and would love to work with you. Your business needs you, lets take care of the backend stuff.
Gibberish Helpline