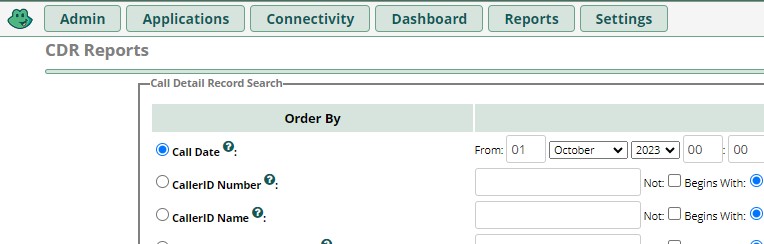
In this guide, we expore how to enable CDR in FreePBX UI, If after enabling the CDR module, you still have no CDR records showing up in FreePBX UI.
Introduction
Call Detail Records (CDR) are crucial for any business or organization using VoIP services for their communication needs. Having CDR enabled in the FreePBX GUI provides several advantages:
- Accountability: CDRs can help track the usage and performance of your phone system.
- Billing: They are essential for accurate client billing, internal cost allocation, and budget planning.
- Security: CDRs can help in detecting unauthorized or suspicious call activities.
- Troubleshooting: They are invaluable for diagnosing and resolving issues related to call quality or system performance.
Diagnosing the issue
Before you start, you should note that FreePBX comes already enable for CDR record display in the gui. However, if you have no records, the problem might be Asterisk related and not necessarily a FreePBX issue.
From first principals, its Asterisk’ job to capture and record CDR and send it to any destination you choose. This could be a CSV file or a database. In this doc, we are going to focus on database as a destination for CDR logs. If Asterisk is not logging to the sql database, it might be that the required libraries to enable Asterisk to talk to the sql database are missing.
To verify the issue you are dealing with, you can run the following commands on the Asterisk console.
:~# rasteriskAnd then check for odbc status
*CLI> odbc show all

ODBC DSN Settings
-----------------

  Name:   asteriskcdrdb
  DSN:    MySQL-asteriskcdrdb
    Last fail connection attempt: 2023-10-01 16:10:52
    Number of active connections: 0 (out of 5)
    Logging: Disabled
From above we can see the number of active connections is 0
Also, we can check the configured CDR destinations
*CLI> cdr show status

Call Detail Record (CDR) settings
----------------------------------
  Logging:                    Enabled
  Mode:                       Simple
  Log calls by default:       Yes
  Log unanswered calls:       No
  Log congestion:             No

  Ignore bridging changes:    No

  Ignore dial state changes:  No

* Registered Backends
  -------------------
    cdr_manager (suspended)
    csv
    Adaptive ODBC
Good news, CDR is already enabled in Asterisk, what we need to do now is install the required libraries.
Installation Steps
Step 1: Download and Install Dependencies
Download and install the following dependencies by running these commands:
Ubuntu 20.04
wget -O /tmp/mysql-community-client-plugins_8.0.34-1ubuntu20.04_amd64.deb https://dev.mysql.com/get/Downloads/MySQL-8.0/mysql-community-client-plugins_8.0.34-1ubuntu20.04_amd64.deb

wget -O /tmp/mysql-connector-odbc_8.0.33-1ubuntu20.04_amd64.deb https://downloads.mysql.com/archives/get/p/10/file/mysql-connector-odbc_8.0.33-1ubuntu20.04_amd64.deb

wget -O /tmp/mysql-connector-odbc-setup_8.0.33-1ubuntu20.04_amd64.deb https://downloads.mysql.com/archives/get/p/10/file/mysql-connector-odbc-setup_8.0.33-1ubuntu20.04_amd64.deb
After downloading, install the packages:
sudo dpkg -i /tmp/mysql-community-client-plugins_8.0.34-1ubuntu20.04_amd64.deb
sudo dpkg -i /tmp/mysql-connector-odbc_8.0.33-1ubuntu20.04_amd64.deb
sudo dpkg -i /tmp/mysql-connector-odbc-setup_8.0.33-1ubuntu20.04_amd64.deb
Ubuntu 22.04
apt-get install libgail-common libgail18 libgtk2.0-0 libgtk2.0-bin libgtk2.0-common
wget -O /tmp/mysql-community-client-plugins_8.0.34-1ubuntu22.04_amd64.deb https://dev.mysql.com/get/Downloads/MySQL-8.0/mysql-community-client-plugins_8.0.34-1ubuntu22.04_amd64.deb

wget -O /tmp/mysql-connector-odbc_8.1.0-1ubuntu22.04_amd64.deb https://dev.mysql.com/get/Downloads/Connector-ODBC/8.1/mysql-connector-odbc_8.1.0-1ubuntu22.04_amd64.deb

wget -O /tmp/mysql-connector-odbc-setup_8.1.0-1ubuntu22.04_amd64.deb https://dev.mysql.com/get/Downloads/Connector-ODBC/8.1/mysql-connector-odbc-setup_8.1.0-1ubuntu22.04_amd64.deb
After downloading, install the packages:
sudo dpkg -i /tmp/mysql-community-client-plugins_8.0.34-1ubuntu22.04_amd64.deb
sudo dpkg -i /tmp/mysql-connector-odbc_8.1.0-1ubuntu22.04_amd64.deb
sudo dpkg -i /tmp/mysql-connector-odbc-setup_8.1.0-1ubuntu22.04_amd64.deb
Step 2: Configure ODBC (both 20.04 and 22.04)
Replace the file /etc/odbc.ini with the following content:
[default]
Driver=/usr/lib/x86_64-linux-gnu/odbc/libmyodbc8w.so

[MySQL-asteriskcdrdb]
Description=MySQL connection to 'asteriskcdrdb' database
driver=MySQL
server=localhost
database=asteriskcdrdb
Port=3306
Socket=/var/run/mysqld/mysqld.sock
option=3
Charset=utf8
Step 3: Restart Asterisk
Once the configuration is done, issue the following command to restart the Asterisk service:
sudo systemctl restart asteriskYou should now be able to view new CDR records in the FreePBX WebUI.
You can also verify on the Asterisk console that connection to sql database is now active.
*CLI> odbc show all

ODBC DSN Settings
-----------------

  Name:   asteriskcdrdb
  DSN:    MySQL-asteriskcdrdb
    Number of active connections: 1 (out of 5)
    Logging: Disabled
Conclusion
Enabling CDR in FreePBX allows for better tracking and management of your phone system. It’s essential for any organization to have this feature enabled for effective VoIP communication management.
Disclaimer:
Asterisk is a Registered Trademark of Sangoma Technologies. Sangoma Technologies (“www.sangoma.com”) is the registered owner of the U.S. federally registered trademark FREEPBX (the “Trademark”), registration number 3365377.
Do you still need help?
Look, our Tech Support Staff live and breathe Cloud Engineering. Let them handle the details, so you can focus on the big picture.
Contact Support