
SSH Jump Host (Bastion Host) on AWS – Getting Started
This guide shows How To Setup SSH Jump Host (Bastion Host) on AWS: A Step-By-Step Guide.
Overview
A Bastion Host also known as a Jump Host, Jump Server, or SSH Jump Host is a hardened entry point that provides secure access to private infrastructure running inside your AWS VPC. Instead of exposing every EC2 instance publicly, you route all SSH access through a single secured host, improving security posture and offering a clear audit path.
This guide walks you through deploying and accessing a Jump Host / Bastion Host on AWS, understanding the architecture, applying security best practices, and connecting via Linux, macOS, or Windows clients.
To make it easy to setup a Jump Host / Bastion Host on AWS, we offer a hardened image on AWS Marketplace that will help you setup a Jump Host in less than 5 minutes. Click Image below to get started.

Why use this image?
This image comes pre-packaged with the security best practices below:
- Disabled password authentication (keys only)
- Fail2ban installed
- Ready for integration with AWS Systems Manager (Session Manager)
- Unused packages removed
- All SSH sessions are logged
- Ready for integration with CloudWatch or other SIEM for monitoring
- Ready for MFA protected SSH (e.g., Duo, Okta, or PAM-based solutions)
Architecture Overview of a Jump host in your network
A typical AWS Jump Host/Bastion Host setup includes:
- Public Subnet: Bastion Host EC2 instance with a public IP
- Private Subnets: Application/database servers with no public IPs
- Security Groups: Strict inbound allowlist for SSH
- IAM: Optional SSM policies to support Session Manager
- NAT Gateway (optional): For outbound access for patching/updates
Diagram:
Internet --> Bastion Host (Public Subnet) --> Private EC2 Instances
Why Use a Jump Host Instead of Direct SSH Access?
Using a Jump Host is a best practice because:
- It reduces exposed endpoints to one hardened server
- You can enforce MFA or SSO SSH access
- Logging is centralized
- Works with DevOps tools (Terraform, Ansible, Packer)
- Fits AWS Well-Architected Framework (Security Pillar)
You should not SSH directly into private workloads.
Connecting Through the SSH Jump Host
Below are examples for Linux/macOS and for Windows users (PuTTY section at bottom).
SSH From Linux or macOS
Method 1: Using SSH ProxyJump (recommended)
ssh -J ec2-user@BASTION_PUBLIC_IP ubuntu@PRIVATE_SERVER_IPor using your key:
ssh -i ~/.ssh/yourkey.pem -J ec2-user@BASTION_PUBLIC_IP ubuntu@10.0.2.15Method 2: Using ~/.ssh/config
Host bastion
  HostName BASTION_PUBLIC_IP
  User ec2-user
  IdentityFile ~/.ssh/yourkey.pem

Host private-server
  HostName 10.0.2.15
  User ubuntu
  ProxyJump bastion
Now connect simply with:
ssh private-serverThis is the cleanest way to use an SSH Jump Host.
Connecting Through a Jump Host Using Windows (PuTTY)
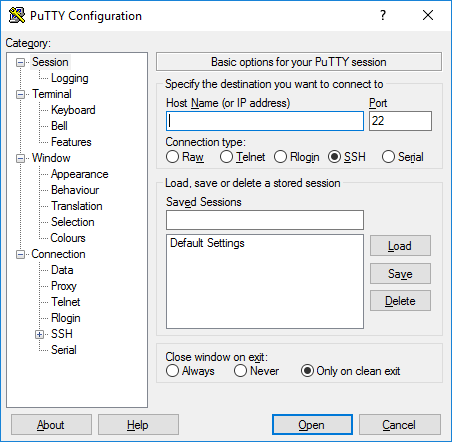
- Open PuTTY
- In Host Name, enter the private server IP
- Go to:
Connection → SSH → Tunnels - Add a proxy command using:
plink.exe -ssh ec2-user@BASTION_PUBLIC_IP -i yourkey.ppk - Save the profile
- SSH normally, PuTTY will route through the jump host
Good for Windows-based operators.
Summary
A Bastion Host / SSH Jump Host is a critical component for secure access to private AWS infrastructure. By deploying a hardened entry-point, enforcing security groups, and using SSH ProxyJump or PuTTY, you significantly reduce exposure and adhere to cloud security best practices.
This guide covered:
- Architecture and benefits
- Launching and securing a Bastion Host
- SSH examples for Linux/macOS
- Optional PuTTY steps for Windows users
Congratulations! You’ve successfully launched your Bastion Host on AWS. Remember to properly configure your security groups to ensure the security of your instance.
Disclaimer:
All product and company names are trademarks™ or registered® trademarks of their respective holders. Use of them does not imply any affiliation with or endorsement by them. This product contains the latest patched software from individual vendors; we do not claim that all vulnerabilities have been addressed.